
Knowing how to check if an Aadhaar number is legitimate is a fundamental skill these days, and luckily, it’s something you can do in just a couple of minutes. The most direct route is through the official UIDAI website. Just use their ‘Verify Aadhaar’ service, pop in the 12-digit number and the security captcha, and you’ll get an instant confirmation of its status.
Think of this quick check as your first line of defence. It confirms the Aadhaar is real and still active, which is crucial for preventing identity fraud.
Table of Contents
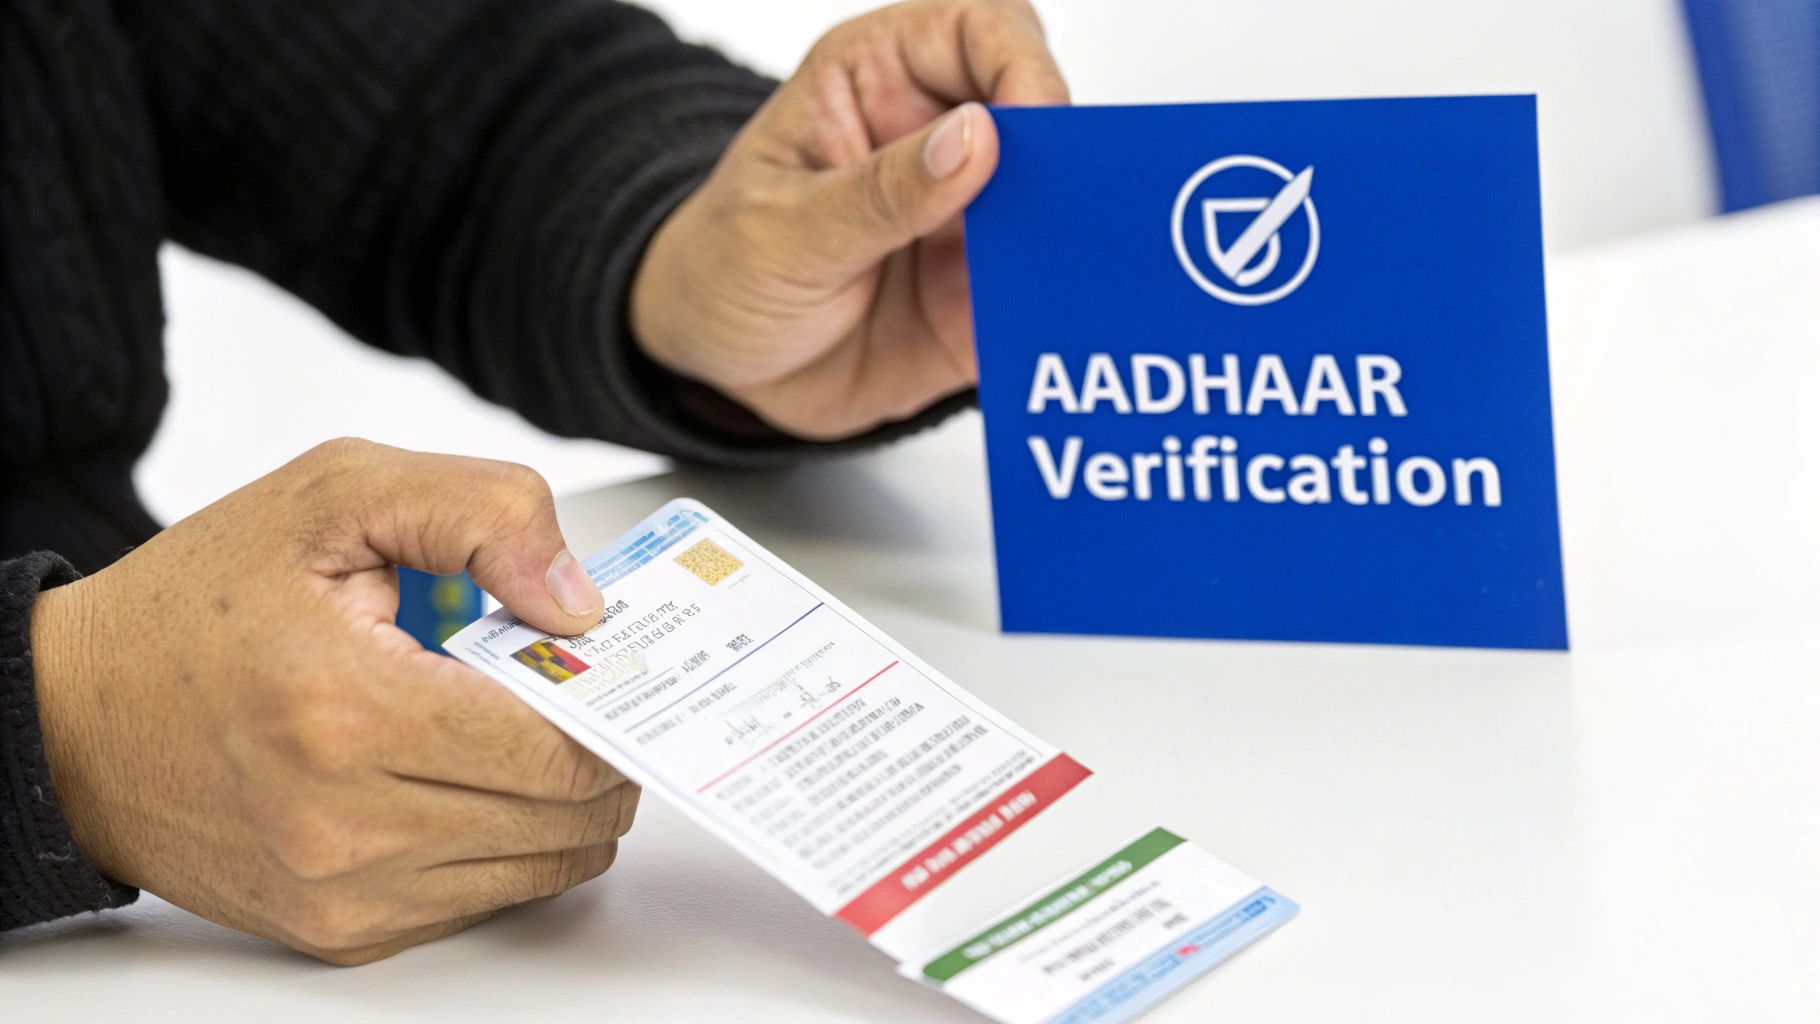
Why Aadhaar Verification Is So Important
In India today, a valid Aadhaar number is the key that unlocks countless services, from opening a bank account to getting a new SIM card. So, verifying an Aadhaar isn’t just a box-ticking exercise; it’s a vital practice for security and building trust.
Whether you’re an employer bringing a new person on board, a landlord screening a potential tenant, or a business completing customer KYC, you need to know the identity you’re dealing with is authentic and currently active in the UIDAI database.
Proper verification is non-negotiable for a few key reasons:
- Stops Fraud in its Tracks: It’s a powerful way to deter identity thieves by confirming the Aadhaar card presented is the real deal.
- Guarantees Authenticity: You’re not just checking a number; you’re validating that it’s genuine and hasn’t been cancelled or tampered with.
- Builds a Foundation of Trust: For any transaction or agreement, this simple step establishes a baseline of trust between parties.
- Keeps You Compliant: Many industries are legally required to perform these identity checks. Aadhaar verification isn’t just good practice—it’s often the law.
To really get a handle on the legal side of things, it’s worth exploring the specifics of https://in.springverify.com/compliance/ requirements in India.
The sheer scale of Aadhaar’s use is staggering. By the end of June, Aadhaar authentication transactions hit an incredible 22.933 billion (that’s 2,293.3 crore), a jump of 7.8% from the previous year. This isn’t just a number; it shows how deeply Aadhaar is woven into our daily lives as the go-to digital identity system.
The Role of UIDAI in Verification
The Unique Identification Authority of India (UIDAI) is the government body that issues Aadhaar numbers and manages the entire verification ecosystem. They provide the official tools you need, like their website and the mAadhaar app, to perform these checks securely.
Here’s a look at the UIDAI portal, which is your main hub for anything and everything Aadhaar-related.
This portal is designed to put you in control, giving you direct access to manage and verify identity information. The principles behind this kind of check are part of the broader concept of credential verification, which creates a framework to make sure every check is reliable and follows national standards.
Using the Official UIDAI Portal for Verification
When you need to be absolutely sure an Aadhaar number is valid, the best move is to go straight to the source. The Unique Identification Authority of India (UIDAI) runs a public service for this exact purpose on its ‘My Aadhaar’ portal. For a quick, one-off check, this is hands-down the most reliable and straightforward method.
Think of it as your first line of defence. Before diving into more complex verifications like e-KYC, this simple online tool answers the most fundamental question: Does this Aadhaar number even exist and is it active? It’s the perfect starting point for landlords, small business owners, or really anyone who needs to perform a basic identity check.
Navigating to the Verification Service
The My Aadhaar portal is loaded with different services, which can feel a bit overwhelming at first. You’re looking for the ‘Verify Aadhaar’ option. It’s usually found under the ‘Aadhaar Services’ tab right on the main dashboard. A quick click will take you to the verification page—no login required.
This direct access is a huge plus. UIDAI intentionally made this a public-facing service, so you don’t need your own Aadhaar or a registered mobile number to use it. All you need is the 12-digit number you want to check and a way to get online.
The process itself is designed to be simple, as this infographic shows. It breaks down the entire flow from collecting the document to using the portal and getting that final confirmation.
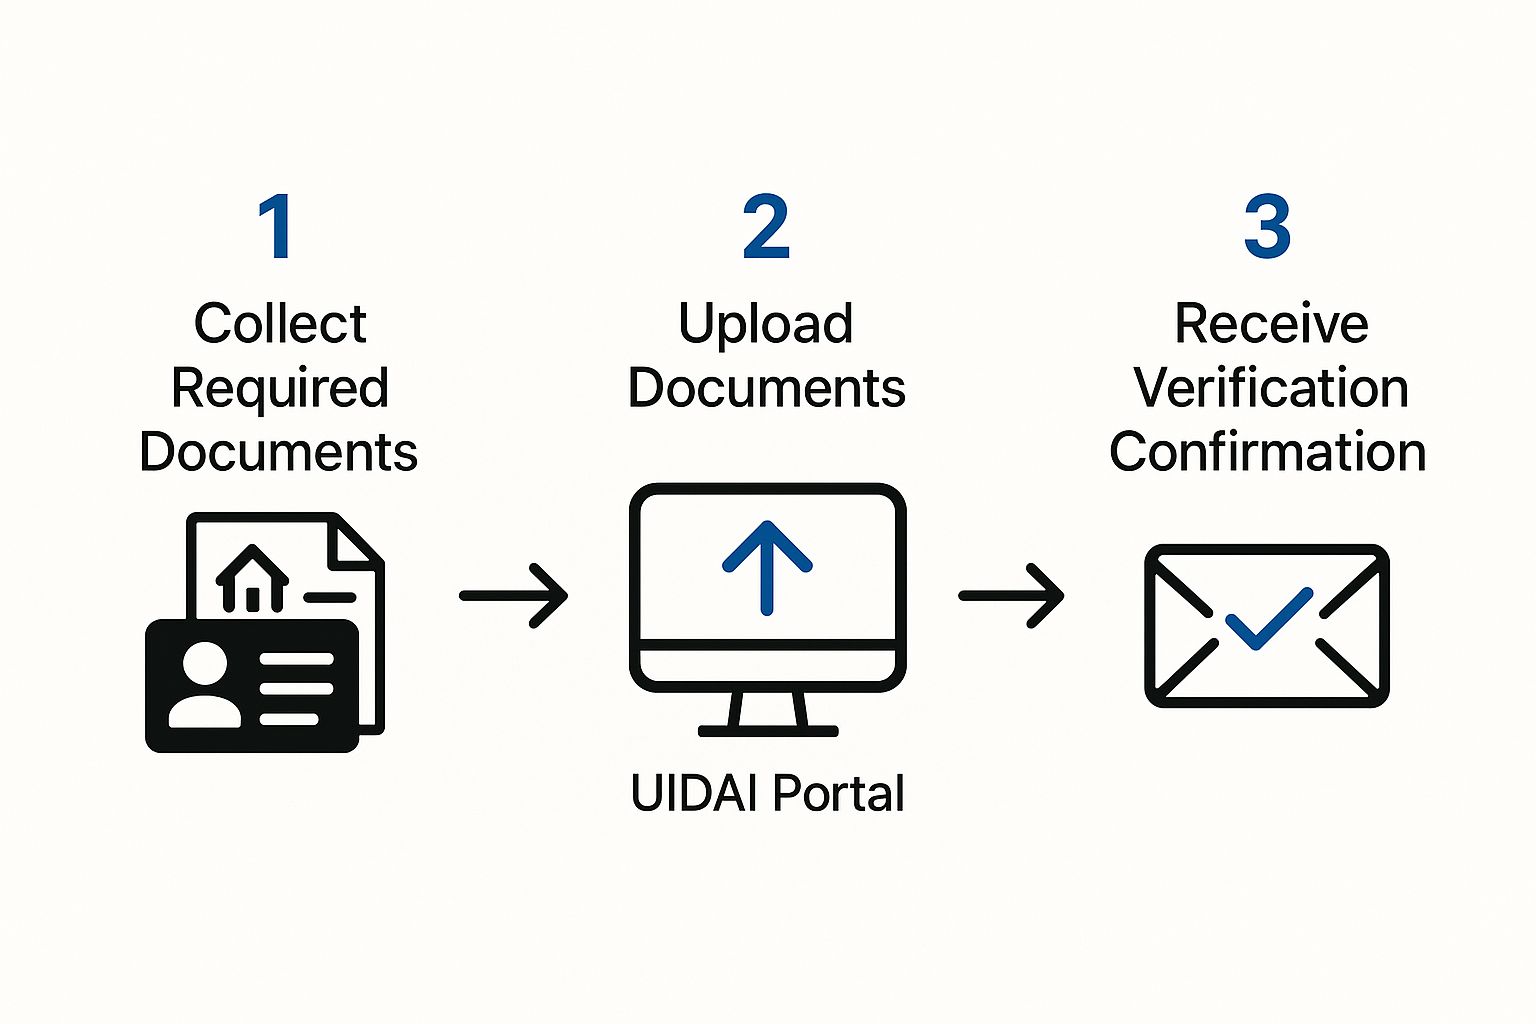
This visual highlights how the portal serves as the main hub for turning a physical document into a digitally verified status, making the process accessible to just about anyone.
Performing the Aadhaar Check
Once you land on the ‘Verify Aadhaar’ page, the process is incredibly direct. You’ll see two fields that need your attention: one for the 12-digit Aadhaar number and the other for a security code, often called a captcha.
- Enter the Aadhaar Number: Carefully type the 12-digit number into the field. It’s worth double-checking for typos, as even one wrong digit will cause the verification to fail.
- Input the Captcha: Look at the image with the jumbled characters and type what you see into the box below. Remember, these codes are case-sensitive.
Once both are filled in, just hit the ‘Proceed and Verify Aadhaar’ button. The system will immediately check the number against the UIDAI database.
Pro Tip: If the captcha is a blurry mess, don’t try to guess. Just use the refresh button next to it to get a new one. Guessing wrong too many times can temporarily lock you out, so it’s better to get it right.
Understanding the Verification Results
The portal gives you an instant answer, and it’s easy to read. To protect the cardholder’s privacy, the results screen shows just enough information to confirm the Aadhaar’s status without revealing sensitive details.
A successful check will show you:
- A green message at the top saying “Aadhaar Verification Completed”.
- Age Band: Instead of a full date of birth, you’ll get a range (e.g., 20-30 Years).
- Gender: This will display as Male, Female, or Transgender.
- State: The state where the Aadhaar holder is registered.
- Mobile Number: Just the last three digits of the linked mobile number will appear (e.g., ***789).
What happens if the number is fake? If you’ve entered a number that’s invalid or simply doesn’t exist, you’ll get a clear error message stating that the “Aadhaar number does not exist.” This is a definitive red flag that the number is either incorrect or fraudulent.
This limited data reveal is a crucial security measure. It gives you what you need to confirm you’re dealing with the right person, but it keeps their full date of birth, address, and mobile number private. This clever balance makes it a safe and highly effective tool for everyday verification needs.
Verifying Aadhaar Instantly with the mAadhaar App
In a world where we handle everything on our smartphones, Aadhaar verification is no different. For anyone needing to check an Aadhaar on the go, the official mAadhaar app is an essential tool. It basically puts the power of the UIDAI portal right in your pocket, but it’s optimised for mobile and even has extra features like a slick QR code scanner.
This mobile-first approach is perfect for real-world, face-to-face situations. Think of a landlord meeting a potential tenant for the first time, or a small shop owner verifying a customer for a big-ticket purchase. The app gives you immediate, on-the-spot confirmation, cutting out delays and adding a solid layer of security to everyday dealings.
Getting Started with the mAadhaar App
Before you can start verifying, you’ll need to get the app set up. It’s available for both Android and iOS users, so accessibility isn’t an issue. Just search for “mAadhaar” on the Google Play Store or the Apple App Store.
Once you’ve downloaded it, the initial setup is pretty straightforward. The app guides you through creating a profile and setting a password, which is crucial for protecting your own Aadhaar details stored inside. Keep in mind, while you can verify anyone’s Aadhaar without a profile, you’ll need one to manage your own digital ID.
Here’s what the app’s official listing looks like on the Google Play Store, where it’s already been downloaded over 50 million times.
This screenshot shows the app’s key features, including the “Verify Aadhaar” and “QR Code Scanner” services that are central to its verification power.
Using the Built-In Verification Tool
The most direct method in the app works just like the UIDAI website. You’ll find a service labelled ‘Verify Aadhaar’ right on the main dashboard. Tapping it brings up a simple screen asking for the 12-digit Aadhaar number you want to check.
After keying in the number and a quick security captcha, the app pings the UIDAI database directly. The results pop up instantly on your screen, giving you the same limited but essential info as the web portal:
- An age band (e.g., 30-40 years)
- The cardholder’s gender
- The registered state
This feature is perfect for when you have the Aadhaar number written down or told to you but don’t have the physical card handy. It’s a fast, reliable check that confirms the number’s validity in seconds.
The Power of the QR Code Scanner
The real star of the show in the mAadhaar app is its integrated QR code scanner. Every Aadhaar card—whether it’s the original letter, a printed e-Aadhaar, or the newer PVC card—has a secure, digitally signed QR code. This little square contains the cardholder’s demographic details, including their photo.
This QR code isn’t just a simple link; it’s an encrypted data packet. Scanning it with the mAadhaar app decrypts the information and verifies its digital signature. This provides a much higher level of assurance than just looking at the card.
Using this feature couldn’t be easier. Just tap the ‘QR Code Scanner’ option from the app’s dashboard, and your phone’s camera will switch on. Point it at the QR code on the Aadhaar card, and the app takes care of the rest.
In a moment, the app will display the cardholder’s details right on your screen:
- Full Name
- Date of Birth
- Gender
- Address
- Photograph
This instant display lets you cross-reference the information with the physical card and the person standing in front of you. It’s a highly effective way to spot tampered or fake cards where the printed details might not match the encrypted data locked in the QR code. This makes the mAadhaar app a powerful anti-fraud tool for anyone needing to perform in-person identity verification.
What Is Aadhaar Paperless Offline e-KYC, Anyway?
Sometimes, just knowing an Aadhaar number is valid isn’t enough. For situations that demand more certainty—think opening a bank account or getting a new SIM card—Aadhaar Paperless Offline e-KYC is the answer. It’s a far more secure and detailed way to handle identity verification.
The real beauty of this method is that you, the Aadhaar holder, are always in the driver’s seat. You get to share your KYC details in a secure, digitally signed format without ever handing over sensitive biometrics. You decide who sees your information and when.
So, How Does Offline e-KYC Work?
At its heart, Paperless Offline e-KYC is a shareable, digitally signed document containing all your key demographic details. This isn’t just a random file; it’s generated straight from the UIDAI database, making it a verifiable and authentic source of truth for your identity.
You start by downloading a password-protected XML file (or a secure QR code) from the UIDAI’s ‘My Aadhaar’ portal. Think of this file as your digital identity card, locked down tight. When an organisation needs to verify you, you simply share this file along with a special Share Code you created. They use that code to unlock and view your details. It’s a foundational process for countless sectors, forming a core part of many identity verification solutions.
The adoption numbers speak for themselves. The broader e-KYC service saw a massive 373 million (37.3 crore) transactions in a single recent month. That’s a nearly 40% jump year-on-year, pushing the total number of transactions to an incredible 23.93 billion (2,393 crore) since it began. It’s clear that Aadhaar authentications are a major engine for India’s digital economy, a trend you can explore further at India Brand Equity Foundation.
The XML File and Share Code: A Two-Part Security System
The entire system’s security is built on two simple but powerful components: the XML file and the Share Code. They work in tandem to guarantee your data stays private and is only seen by the right people.
- The XML File: This is a machine-readable document containing your identity details. Critically, it’s digitally signed by UIDAI, which is like a digital seal of authenticity. No one can tamper with it.
- The Share Code: This is a 4-character code you create yourself when you download the XML file. It’s the password. Without it, the XML file is just a locked, unreadable document.
It’s like having a locked digital safe (the XML file). You can hand over the safe to someone, but only the person you also give the unique key to (the Share Code) can actually open it and see what’s inside.
This two-factor approach is what makes Offline e-KYC so effective. It gives you the confidence to share your information, knowing it’s completely shielded from prying eyes.
What Information Gets Shared?
When an organisation unlocks the XML file with your Share Code, they get a comprehensive set of your demographic data. This is far more detailed than a basic online check, which is why it’s perfect for formal KYC procedures.
Here’s what the file typically includes:
- Full Name
- Address
- Date of Birth
- Gender
- Photograph
- Mobile Number (masked for privacy)
- Email Address (also masked)
This rich data set allows companies to meet their verification needs quickly and efficiently, all while you keep ultimate control over your personal information. It strikes that perfect balance between providing necessary details and fiercely protecting your privacy.
How Aadhaar Face Authentication Works
Welcome to the future of identity checks. Aadhaar Face Authentication is a game-changer, offering a completely contactless way to verify someone’s identity using just their face. This isn’t science fiction; it’s a secure, AI-powered service being rolled out across banking, telecom, and government services for its sheer convenience.
Think about it. This is a massive help for people whose biometrics, like fingerprints, are no longer reliable. For manual labourers or the elderly, worn-out fingerprints can be a real barrier to accessing essential services. Face authentication sidesteps that problem entirely, ensuring everyone can get verified without hassle. It’s a powerful tool that works alongside existing fingerprint and OTP methods.

We’re already seeing its impact in the real world. Imagine pension disbursements where elderly beneficiaries can authenticate themselves from the comfort of their homes. Or think about issuing SIM cards in remote areas where carrying biometric devices isn’t always practical. This is where face authentication truly shines.
The Technology Behind the Scan
So, what’s going on behind the scenes? At its core, Aadhaar Face Authentication relies on a smart process called liveness detection. This is crucial. It’s not just about matching a static photo to the one stored in the UIDAI database. The system needs to know it’s looking at a real, live person.
Here’s a quick rundown of how it works:
- An authorised app, from a registered service provider like a bank, kicks off the request.
- The user’s phone then uses the ‘AadhaarFaceRd’ app to capture a live video feed of their face.
- This is the clever part. Advanced algorithms analyse the feed for subtle signs of life, like blinking, to make sure someone isn’t just holding up a photo or playing a video.
- Once liveness is confirmed, the facial data is encrypted and shot over to UIDAI’s Central Identities Data Repository (CIDR). There, it’s compared in a 1:1 match against the image linked to the Aadhaar number.
The whole thing happens almost instantly, creating a verification experience that is both secure and incredibly smooth.
Key Insight: The “liveness” check is the secret sauce. It’s what makes this method so secure. By confirming the person is physically present, it shuts down common fraud tactics like using a printed photograph, making it a powerful defence against identity theft.
The adoption rate for this technology has been nothing short of explosive. In a recent month alone, face authentication transactions hit a new record of 193.6 million (19.36 crore). That’s more than a threefold jump in just one year, which tells you just how quickly this is becoming a go-to verification method across India. You can dig into the numbers and see the growth trend for yourself by exploring the latest transaction data.
How to Use Face Authentication
To actually use face authentication, you’ll need an app from a registered Authentication User Agency (AUA) or KYC User Agency (KUA)—think banks or mobile network operators. For the person being verified, the process is dead simple.
The first thing you need is the AadhaarFaceRd app on your smartphone (RD stands for Registered Device). This app, built by UIDAI, isn’t something you use directly. Instead, it works quietly in the background as a secure service that other official apps can call on to perform the facial scan.
Here’s what the user journey typically looks like:
- The bank’s or telecom operator’s app will ask you to verify yourself using a face scan.
- This will automatically trigger and open the AadhaarFaceRd app’s camera interface.
- You’ll get on-screen instructions to position your face correctly in the frame. Good lighting and a plain background are key here.
- The app captures your face, runs the liveness check, and then securely sends the data off for verification.
- Within seconds, a success or failure message pops up in the original app you started with.
It’s a really slick integration. The user gets a straightforward experience, while all the heavy lifting and security checks happen securely on the backend. It’s a brilliant way to handle identity verification without needing any special hardware—just the camera on a regular smartphone.
Solving Common Aadhaar Verification Problems
Even with the most straightforward tools, hitting a snag during Aadhaar verification is bound to happen. The good news? The issues are usually minor and easy to fix once you know what you’re looking for. Let’s walk through the most frequent verification roadblocks and how to clear them.
Most errors pop up from simple data entry mistakes or outdated information in the UIDAI database. A small typo can easily trigger a “verification failed” message, which is more frustrating than it needs to be. The key is to stay calm and systematically check the usual suspects.
Dealing with an Unlinked Mobile Number
One of the most common hurdles, especially for OTP-based services, is finding out your mobile number isn’t linked to your Aadhaar. If you’re trying a verification that needs an OTP but the message never arrives, this is almost always the culprit. For security reasons, you can’t add or update your mobile number online.
To get this sorted, you’ll have to visit a permanent Aadhaar Enrolment Centre.
- First, find your nearest centre using the UIDAI website.
- You’ll need to fill out a correction form and go through a quick biometric authentication.
- The update is typically processed within a few days, and after that, you’ll be all set to receive OTPs.
This is a crucial step for accessing a whole range of Aadhaar-linked services, so it’s definitely worth getting done.
When the Details Displayed Are Incorrect
What happens if the verification goes through, but the details that pop up—like the age band or gender—are just plain wrong? This means the Aadhaar number is valid and active, but the information attached to it in UIDAI’s Central Identities Data Repository (CIDR) is incorrect or hasn’t been updated.
This is more than a small inconvenience; it can cause real headaches with KYC processes for banks and other institutions. The solution is to apply for an Aadhaar data update. For demographic details, this can often be handled online through the My Aadhaar portal, as long as your mobile number is correctly linked.
Important Takeaway: A successful verification only confirms the Aadhaar number is active. It doesn’t guarantee the demographic data is accurate. Always cross-check the displayed information against the individual’s other documents.
Unpacking the ‘Aadhaar Number Does Not Exist’ Error
Seeing an “Aadhaar Number Does Not Exist” message can be alarming, but it almost never means the number is fake. The most common cause is a simple typing error. Before you panic, carefully re-enter the 12-digit number and double-check every single digit.
Another possibility is that you’re entering the Enrollment ID (EID) from the acknowledgement slip instead of the final Aadhaar number. Make sure you’re using the correct 12-digit Aadhaar. In very rare cases, an Aadhaar might be deactivated, which would also throw an error.
For businesses seeing this issue frequently, integrating verification APIs can dramatically cut down on manual entry errors and improve the efficiency of your talent acquisition pipeline.
If you’ve double-checked the number and are certain it’s correct, the individual should get in touch with UIDAI through their helpline or visit an enrolment centre to find out what’s going on with their Aadhaar status.
Got Questions? We’ve Got Answers
When it comes to Aadhaar verification, a few questions tend to pop up again and again. Let’s clear up some of the most common ones so you can navigate the process with confidence.
What Information Does a Basic Aadhaar Check Actually Reveal?
Many people worry about privacy, and rightly so. The good news is that a simple online verification on the UIDAI portal is designed to protect personal data.
It will not show sensitive details like a full name, address, or date of birth. Instead, it only gives you a confirmation on a few key points:
- An age band (e.g., 20-30 years).
- Gender.
- The state where the Aadhaar was registered.
- The last three digits of the mobile number linked to the card.
This is just enough information to confirm the Aadhaar is active and valid, without oversharing the holder’s private information.
How Do I Link My Mobile Number to My Aadhaar Card?
This is a big one, and for good reason—your mobile number is key to most OTP-based verifications.
For security purposes, you can’t link or update your mobile number online. You’ll need to do this in person by visiting an official Aadhaar Enrolment Centre. Once there, you’ll fill out a correction form and complete a quick biometric authentication to securely update your details on the spot.
What Should I Do if an Aadhaar Card Looks Tampered With?
If you’re handed a physical Aadhaar card that seems altered, damaged, or just plain fake, your best line of defence is the official mAadhaar app’s QR code scanner.
Don’t just trust what’s printed on the card. The QR code contains digitally signed, encrypted data straight from the source. Scan it with the app. If the details that pop up on your screen don’t perfectly match what’s on the physical card, consider it a major red flag.
Ready to make your hiring process faster and more secure? With SpringVerify, you can automate background checks, including Aadhaar and other identity verifications, with a powerful API that integrates directly into your workflow. Learn more and get started at https://in.springverify.com.


